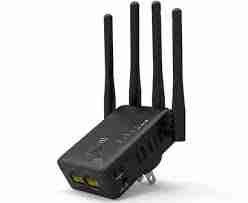
The Wavlink Aerial X AC1200 Extender setup is a reliable and powerful device designed to enhance Wi-Fi coverage and improve connectivity in your home or office. Operating on dual bands, it provides increased speed, reduced interference, and expanded coverage. The setup process is user-friendly, often involving a simple connection to an existing Wi-Fi network through a web-based interface. Its compact design and versatile placement options make it easy to integrate into any environment. With features like WPA/WPA2-PSK security, the Aerial X Extender ensures a secure extended network. By eliminating dead zones and providing an extended Wi-Fi experience, the Wavlink Aerial AC1200 Extender Setup helps you stay connected across your space.
Wavlink Aerial X Extender Setup manually
The Wavlink Aerial X Extender setup via manual method procedures are as follows:
- Wait for the Aerial X Extender to turn on after plugging it into an electrical socket.
- Go to your Wi-Fi settings on your computer or mobile device and join the network “Wavlink_EXT.”
- the connected device’s web browser should be opened.
- In the address field, type “192.168.10.1” and press Enter.
- Log in using the standard credentials .
- You will be guided through the procedure via the setup wizard. After choosing your language, click “Next.”
- Pick your current Wi-Fi network from the list, then type the password. Press “Next.”
- Change the extended network’s settings anyway you want, or stick with the defaults.
- Extender Network Connection:
- Using the given SSID and password, connect your devices to the expanded Wi-Fi network.
- To finish the setup procedure, click “Finish”.
- To provide enough coverage, set the extender in the best possible spot and, if necessary, change its position to improve signal strength.
NOTE: Please get in touch with a professional or visit the official website if you need help with ap setup.
Wavlink Aerial X AC1200 Extender using the WPS button
To set up the Wavlink Aerial X AC1200 Extender via WPS button, follow these simple steps:
- Connect the extender to an electrical outlet.
- The extender’s WPS button should be pressing it.
- Press the WPS button on your WiFi router in 2 minutes.
- Watch for the WPS LED to turn solid on the extender, which denotes a successful connection.
- For the best coverage, move the extender if necessary.
- Your devices should be connected to the expanded Wi-Fi network.
Your devices should be able to connect to the extended Wi-Fi network now that your Wavlink Aerial X AC1200 Extender has been setup using the WPS button.
Wavlink Aerial X AC1200 Extender Setup via THE TETHER APP
Use the Tether app to configure the Wavlink Aerial X AC1200 Extender by following these steps:
- Install the “TP-Link Tether” app by searching for it in the App Store (for iOS) or Google Play Store (for Android) on your mobile device.
- The Aerial X AC1200 Extender should turn on after being plugged into a power source.
- Go to the Wi-Fi settings on your mobile device and join the network “Wavlink_EXT.”
- Open the Tether app on your smartphone.
- Click “Add Device” and choose “Range Extender.”
- Select “Wavlink” as the manufacturer of the device, then “Aerial X AC1200” as the model.
- You will be taken through the setup procedure by the Tether app. Follow the on-screen directions to connect the extender to your existing Wi-Fi network.
- Use the default values or change your extended network settings as necessary.
- Connect your devices (phone, tablet, etc.) to the expanded Wi-Fi network once it has been setup.
- To provide adequate coverage, set the extender in the best possible spot and, if necessary, change its position to improve signal strength.
Now having been configured, your Wavlink Aerial X AC1200 Extender is prepared to enhance your Wi-Fi coverage with the Tether app.
How do i login Wavlink AC1200 Extender Setup?
Login to the Wavlink Aerial X AC1200 Extender setup
- A web browser can be launched.
- You can either type ap extender setup or the Wavlink Aerial X AC1200 Extender’s IP address, which is 192.168.10.1.
- All users are admins as ap.setup can enter their username and password here.
- After that, it will be simple for you to access the settings.
Wavlink Aerial X access point setup
Here is a brief installation guide for the Wavlink Aerial X AC1200 Extender for use as an access point:
- Connect the extender to an electrical outlet.
- Connect your device to the “Wavlink_EXT” Wi-Fi network.
- Launch a web browser and type the extender’s default IP address, generally “192.168.10.1.”
- Log in using the standard credentials (often “admin” for both the username and password).
- Pick “Access Point” mode from the options menu.
- To finish the access point setup, follow the on-screen instructions.
Now that it has been configured as an access point, the Wavlink Aerial X AC1200 Extender is prepared to expand your network.
How do i reset Wavlink Aerial X Wifi Extender?
Follow these instructions to restart the Wavlink Aerial X WiFi Extender:
- On the extender, locate the reset button. The “Reset” label is typically located in a small hole.
- Press and hold the reset button for 10 to 15 seconds using a paperclip or a similar object.
- As soon as the extender’s lights start to blink, indicating a successful reset, let go of the reset button.
- Give the extender a chance to return to its default settings. This could take a while.
- Join the extender’s network and setup it once more with the correct settings.
After successfully resetting your Wavlink Aerial X WiFi Extender to factory settings, you can proceed to customise it to suit your needs.