Drywall is an omnipresent building fabric utilized in homes and commercial properties for its reasonableness, flexibility, and ease of establishment. Be that as it may, in spite of its solidity, drywall is helpless to harm from impacts, dampness, and settling over time. Luckily, repairing drywall is a reasonable DIY errand with the right devices, materials, and strategies. In this comprehensive guide, we’ll walk you through everything you need to know to handle Drywall Repair in Cape Coral, FL, like a pro.
1. Evaluate the damage:
Before plunging into repairs, carefully evaluate the degree and nature of the harm to your drywall. Common issues include gaps, splits, scratches, and water damage. Decide whether the harm is shallow or basic and whether any fundamental issues require addressing.
2. Assemble materials and tools:
Equip yourself with the fundamental materials and instruments for drywall repair. This may incorporate drywall compound (joint compound), drywall tape, sandpaper, putty cut, utility cut, drywall screws, sanding piece, groundwork, and paint that matches your existing divider color.
3. Plan the work area:
Clear the region around the harmed drywall and ensure floors and decorations are covered with drop cloths or plastic sheeting. Guarantee satisfactory ventilation and utilize a tidy veil to secure against airborne particles produced during sanding.
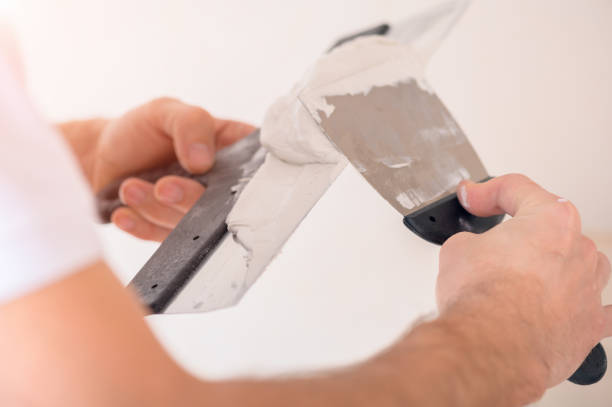
4. Fix little gaps and cracks:
For little gaps and breaks, clean the zone encompassing the harm and apply a lean layer of joint compound utilizing a putty cut. Press drywall tape into the compound and smooth out any excess. Once dry, sand the fixed region smooth and apply extra layers of compound as needed.
5. Repair bigger holes:
For bigger gaps, cut absent-harmed drywall to make a clean, rectangular, or square opening. Cut a piece of substitute drywall somewhat bigger than the gap and secure it to the studs with drywall screws. Apply joint compound and drywall tape to the creases, feathering the edges for a consistent finish.
6. Address water damage:
Water harm can debilitate drywall and lead to form development if left untreated. After tending to the source of the water interruption, cut away any damaged segments of drywall and permit the range to dry altogether. Supplant any compromised separator and fix the drywall after standard repair procedures.
7. Sand and smooth:
Once the joint compound has dried, sand the repaired regions using fine-grit sandpaper or a sanding square. Quill the edges of the repair to mix consistently with the encompassing divider surface. Wipe away with a soggy cloth, or wipe some time recently while continuing to prepare and paint.
8. Prime and Paint:
Apply a coat of primer to the repaired regions to advance the attachment and consistency of the paint wrap-up. Once the groundwork is dry, paint the fixed ranges to coordinate the encompassing divider color. Utilize a brush or roller to apply paint equally, feathering the edges for a consistent blend.
9. Wrapping Up Touches:
Inspect the repaired ranges once the paint has dried, and make any last touch-ups as required. Reinstall trim or molding if fundamental, and clean up the work range. Appreciate your workmanship and take pride in reestablishing your drywall to its previous glory.
10. Know when to look for proficient help:
While numerous drywall repairs can be handled as DIY ventures, there are occurrences where proficient help may be justified. If you experience broad harm, basic issues, or challenges beyond your expertise level, do not hesitate to seek counsel with a qualified temporary worker or drywall specialist.
End
By taking these step-by-step enlightening steps and working out persistence and consideration for detail, you can ace drywall repair and keep up the magnificence and keenness of your dividers for a long time to come. Keep in mind to take your time, work carefully, and do not waver to offer assistance or direction when required. With honed skills and encounters, you’ll become a capable drywall repair aficionado in no time.