Installing new windows is a critical home improvement project that can upgrade energy proficiency, elegant allure, and, in general, solace. Whether you’re supplanting old, drafty windows or introducing windows in another development project, legitimate installation is fundamental for ideal execution and life span. In this exhaustive guide, we’ll walk you through the bit-by-bit course of introducing windows, from readiness and estimation to fixing and final details. By adhering to these directions cautiously, you can guarantee a fruitful window installation in Huntsville AL and partake in the advantages of lovely, utilitarian windows in your home.
Step 1: Assemble Materials and Instruments
Before you start the installation interaction, assemble every one of the fundamental materials and devices:
- Measure tape
- Level
- Screwdriver
- Caulking weapon
- Shims
- Protection froth
- Hammer
- Nails or screws
- Well-being glasses and gloves
Stage 2: Set up the Opening
The most vital phase in introducing windows is to set up the initial location where the window will be introduced.
- Eliminate any old windows, trim, and trash from the opening.
- Review the window opening for harm and make any important fixes.
- Really take a look at the opening for parity and guarantee that it is appropriately measured for the new window.
Step 3: Introduce Glimmering and Weatherproofing
Then, apply blazing and weatherproofing materials to create a hindrance against dampness and drafts:
- Apply self-cement blazing tape around the border of the window opening.
- Introduce a metal dribble edge blazing over the window to coordinate water away from the opening.
Step 4: Embed the Window
Cautiously place the window into the pre-arranged opening.
- Position the window so it is focused and even out to guarantee that it.
- Embed shims between the window outline and the opening to make a cozy fit.
- Really look at the window for evenness and change the shims on a case-by-case basis.
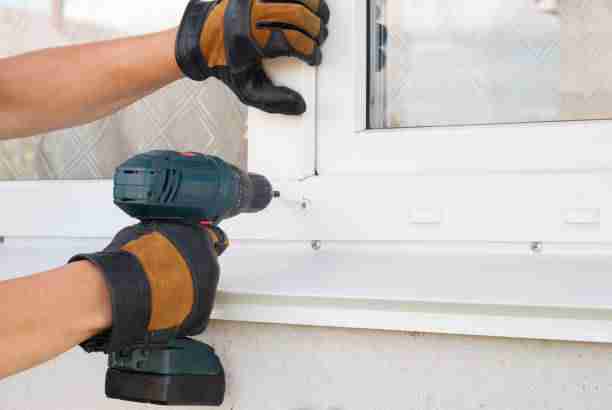
Step 5: Secure the window
When the window is appropriately situated, secure it up.
- Drive screws or nails through the window outline and into the encompassing outlining individuals.
- Utilize a level to guarantee that the window stays plumb and level during installation.
Step 6: Protect and Seal
To forestall air penetration and further develop energy effectiveness, protect and seal around the window:
- Apply growing froth protection between the window outline and the opening to fill any holes.
- Seal the outside border of the window with caulking to make a watertight seal.
Step 7: Introduce Trim and Last Little Details
Complete the installation by adding trim and the last little details:
- Introduce inside and outside trim around the window to cover holes and give it a finished appearance.
- Apply caulking or sealant around the edges of the trim to ensure consistent completion.
Step 8: Test and Change
Prior to finishing the installation, test the window to guarantee it works without a hitch.
- Open and close the window to check for smooth activity.
- Investigate for any holes or breaks around the window and make any fundamental changes.
Step 9: Tidy up
When the installation is finished, tidy up the workspace.
- Eliminate any overabundance of caulking, froth protection, or garbage from the window and encompassing region.
- Discard old windows, trim, and bundling materials mindfully.
Step 10: Participate in Your New Windows
Pause for a minute or two and partake in the advantages of your recently introduced windows:
- Value the magnificence, solace, and energy effectiveness of your refreshed windows.
- Consistently assess and keep up with your windows to guarantee they stay in ideal condition into the indefinite future.
By adhering to these step by step directions, you can effectively install new windows in your home and partake in the many advantages they give. Whether you’re a carefully prepared Do-It-Yourself fan or handling a window installation interestingly, legitimate planning, scrupulousness, and cautious execution will guarantee an expert quality outcome that improves the worth and solace of your home.