Installing an HVAC system is a significant investment that pays off in terms of comfort, efficiency, and energy savings. To make sure you get the most from your system, it’s important to approach the installation process with preparation and knowledge. From the initial assessment to the final setup, following a structured process can turn what could be a stressful task into a hassle-free experience. This guide covers everything you need to know for a smooth and successful HVAC installation.
1. Research HVAC Installation Near Me
Finding the right contractor for the job is key to a seamless installation. When searching for HVAC installation near me, look for licensed and certified professionals with experience in your area. Local professionals understand specific climate needs and are familiar with local building codes and regulations. They can provide expert advice on energy-efficient models, compatible equipment, and installation methods that are ideal for the conditions in your area. Reading reviews, asking for referrals, and checking certifications are also valuable steps to ensure the contractor you choose has a proven track record for high-quality work.
2. Schedule a Comprehensive Assessment
A quality HVAC installation starts with a detailed assessment of your property’s unique needs. During this visit, the HVAC technician will evaluate factors like the size of your space, insulation levels, window placement, and air distribution needs. Accurate sizing is essential; if your unit is too large or too small, it won’t run efficiently, which can lead to higher energy costs and reduce the system’s lifespan. This assessment ensures the HVAC system chosen is properly tailored to your property, delivering consistent performance and keeping your home or business comfortable year-round.
3. Choose the Right HVAC System
Once the assessment is complete, your HVAC technician will provide recommendations for a system that best suits your needs. Factors to consider include energy efficiency, Seasonal Energy Efficiency Ratio (SEER) ratings, and features like smart thermostats or variable-speed fans. High-efficiency systems often qualify for rebates or tax credits, so be sure to ask about any available incentives. Selecting the right unit ensures optimal performance, reduces monthly utility costs, and lowers the environmental impact of your HVAC system.
4. Budget and Understand All Costs Involved
Installing an HVAC system is a substantial investment, so it’s crucial to understand the full breakdown of costs. These include the price of the HVAC unit, labor costs for installation, any necessary upgrades to existing ductwork, and potential electrical work. Additional costs for permits or energy efficiency testing may also apply. Many HVAC companies offer financing options to make this investment more affordable, spreading out payments over several months or years. Before installation day, ask for a detailed estimate to avoid surprises and keep your budget in check.
5. Prepare for Installation Day
Before installation day, there are a few steps to take to ensure a smooth process. Clear the area where the HVAC unit will be installed, such as the utility room, attic, or outdoor space, to allow easy access for technicians. Remove any items or obstructions that might be in the way, and plan to keep children and pets safely away from the work area. This preparation makes it easier for technicians to focus on the job and ensures they can complete the installation without interruption.
6. Inspect and Update Ductwork if Necessary
If your property has an existing HVAC system, the ductwork may need to be updated. Damaged, leaking, or outdated ductwork can hinder the performance of a new HVAC system. Air leaks in the ducts reduce efficiency and make it harder for the system to maintain the desired indoor temperature. If your ducts need repairs or replacement, your technician will address this as part of the installation. This step is essential for maximizing energy efficiency and ensuring even distribution of air throughout your space.
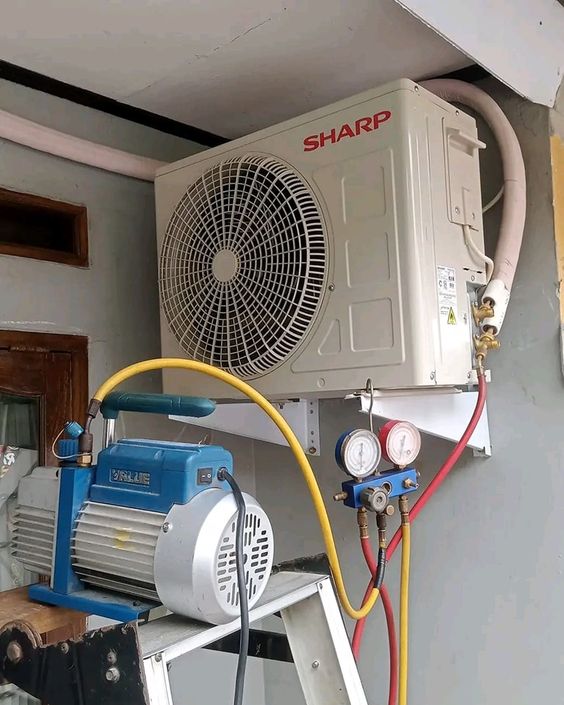
7. Installation Process
The installation process involves several key steps that HVAC technicians will handle. They’ll start by placing the outdoor unit on a stable, level surface to prevent shifting and reduce noise. They’ll then connect the outdoor unit to the indoor system, which includes the air handler or furnace. Electrical connections and refrigerant lines are installed carefully to ensure they meet safety standards. If your property requires a new thermostat, it will be set up and wired as part of this process. Professional HVAC installation ensures that every component is correctly fitted, which helps prevent malfunctions and ensures reliable performance.
8. Testing the System
Once installation is complete, the technicians will test the HVAC system to verify everything is functioning correctly. This includes checking airflow, testing the thermostat, and measuring refrigerant levels to confirm optimal performance. They’ll also check the system’s response to temperature changes and ensure all safety features are working properly. This testing phase allows any final adjustments to be made before technicians finish, ensuring your system is fully operational and ready to keep you comfortable.
9. Learning to Use Your New HVAC System
After the system is tested and functioning as expected, the technician will give you a walkthrough on how to operate it effectively. They’ll demonstrate thermostat controls, explain any energy-saving settings, and go over maintenance tasks, such as when and how to replace air filters. Learning these basics helps you make the most of your HVAC system and avoid unnecessary strain on the unit. For systems with smart controls, they may also help you set up and customize the settings, allowing for remote control and monitoring options that can further increase efficiency.
10. Set Up a Regular Maintenance Schedule
Routine maintenance is essential for extending the life of your HVAC system and maintaining efficiency. Many HVAC providers offer maintenance plans that include annual inspections, tune-ups, and priority service. Regular maintenance checks involve inspecting refrigerant levels, checking for leaks, cleaning coils, and verifying the accuracy of thermostat settings. This proactive approach prevents small issues from escalating into costly repairs, helping you get the most out of your HVAC investment.
11. Review the Warranty and Service Options
A warranty is an important part of your HVAC investment, as it covers certain repairs and replacements if problems arise. Most new systems come with a manufacturer’s warranty, which covers parts for a specific period. Extended warranties are sometimes available and may include both parts and labor. Be sure to understand what’s covered by the warranty and its duration. This information will help you plan for potential repair costs and gives you peace of mind knowing that your system is protected.
Final Thoughts
A successful HVAC installation doesn’t just rely on choosing the right equipment; it requires careful planning, expert installation, and ongoing maintenance. By following this guide, you’ll ensure a hassle-free installation process that leads to optimal comfort, energy savings, and long-lasting performance. From selecting the right contractor to understanding your warranty, each step is designed to simplify the process and maximize your HVAC system’s value.
This article is designed to keep your audience informed and engaged while using your keyword in a natural, impactful way. The step-by-step format makes it easy for readers to follow, and addressing essential elements like testing, budgeting, and maintenance supports long-term value and performance for the HVAC system.